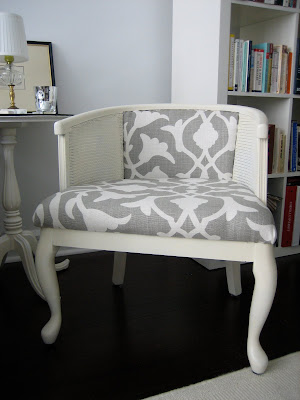
I know I've been taunting you with the finished chair project for forever now so without further adieu... here it is! It was a longer process than I expected, and not to mention I've been distracted with other life going-ons, but I'm very happy with the end result (it was worth the sweat and tears) and it looks great in the new apartment.
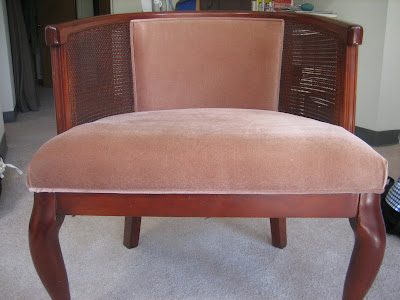
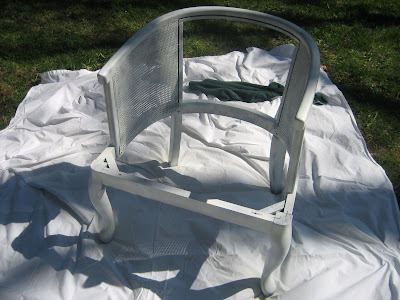
To refresh your memory, here is where we started. Orange cherry wood and mauve velvet.

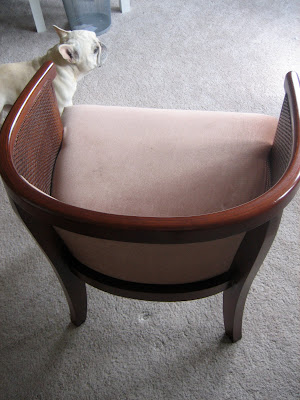
I started off by unscrewing the seat bottom from the frame. Then as you can see, there were hundreds of staples (I might be slightly exaggerating, but there were a lot) in the chair frame and seat bottom. I removed every single one of them... by hand... with pliers. Ugh, it wasn't fun.
Then I tackled the seat back. I took tons of pictures as I was disassembling everything so that I would have a visual of how to put it back together.

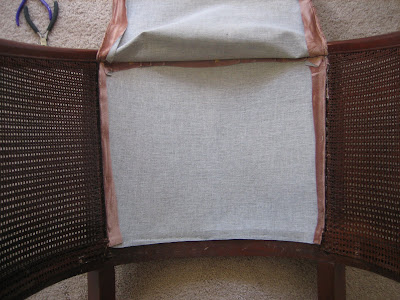
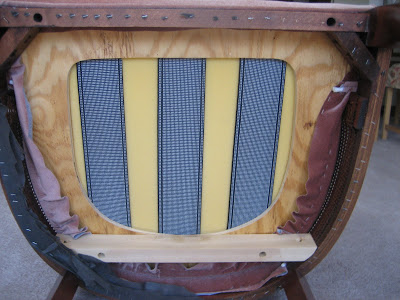
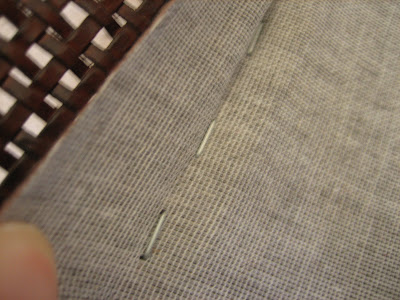
The tricky part was the slight groove around the perimeter of the seat back. (You can slightly see how the staples are indented in the groove in the picture below.) I needed to buy a special upholstery stapler so that the tip of the stapler would be able to fit in that groove. Otherwise, I wouldn't have a tight, taut fit.
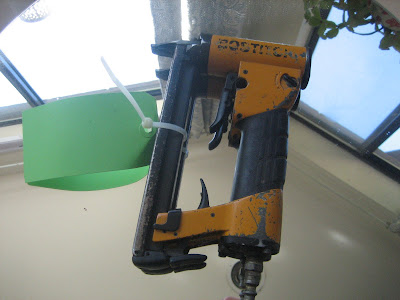
That's where this guy comes in. I purchased it off eBay for $25. Don't you just love eBay? I wouldn't even know where to begin to search for a used pneumatic stapler if it wasn't for eBay!
Once all the upholstery was off, I sanded, primed and spray painted the chair with Rustoleum's Heirloom White.
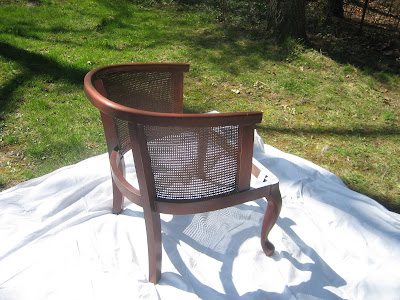
Finally I added a coat of Minwax's Wipe-On Poly to protect the paint.
And as you know from
this post, I ordered my fabric from the fabulous Jenny at
Little Green Notebook. (Unfortunately I don't have any pictures of the reupholstering process. I think I was too wrapped up in making it perfect to take pictures.) I rented an air compressor (similar to
this one) from Home Depot for the day and was happily stapling away when...
dun, dun, dun... I ran out of staples. The staple gun came with a line of staples and stupidly I bought more staples at Home Depot thinking they would fit. Of course they didn't. And please note that you cannot buy the special upholstery staples at any of the home repair stores. I know, I frantically checked out every single one of them in town. You can only get them online or I suppose if you have a re- upholsterer in town they might lend you a few. So I bought them
here and returned the air compressor. $30 down the tubes. The second time around fared much better. I was able to finish the project and now I have enough upholstery staples to last me a lifetime.

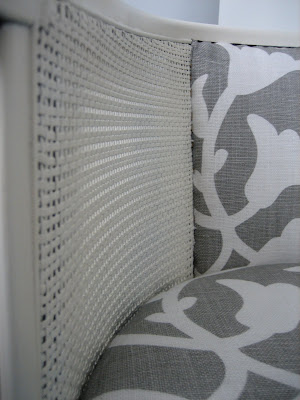
So here it is, the finished chair. I really love the way it turned out and how the fabric unexpectedly matches our sofa!


 Navy loves the chair too!
But wait... there's more! (Yes, I know I'm beginning to sound like an infomercial, sorry, it's a long post) I was shopping with my mother-in-law at some of her favorite thrift stores in Massachusetts when I stumbled upon this vanity bench. Loved the shape and the size, just didn't love the dark wood or the fabric. For $65, I thought it was a worthwhile investment and it would match the chair.
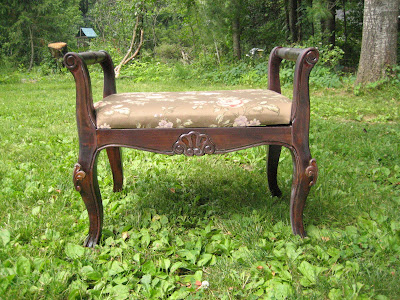
Luckily I had enough paint and fabric left over to re-do this for practically free. And since the upholstered seat came right off, I was able to use my hand held stapler instead of the pneumatic stapler for a quick and easy job. One day I will have an air compressor, just not while I'm living in a tiny NYC apartment.

It's the perfect bench slash ottoman for our tiny living room. Extra seating that takes up minimal space is always a plus.
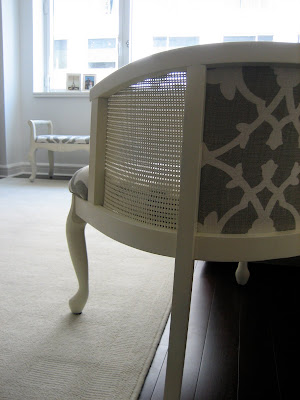 I just love when rooms easily come together.
So here's the spending breakdown:
Original chair: $50 off craigslist
Sandpaper, Paint, Primer and Wipe-on Poly: approx. $30
Fabric: $162 for 3.8 yards (I probably only used 2 yards for both projects, so I have a lot left over)
Pneumatic Stapler: $25
Upholstery Staples: $19 (They only cost $5.80 but the UPS ground shipping cost twice as much!)
Air Compressor rental: $60 for two rentals
Total: $346
The cheapest reupholstery quote that I got was for $175 so honestly, if I had gotten it reupholstered professionally it would have only been slightly more expensive. However, the experience was invaluable and now I actually own the tools to do this again. The investment was definitely worth it.
Finally, here are some resources that were indispensable during my completion of this project:
Centsational Girl- Kate really is the It Girl for all things involving spray paint and refinishing. Without her I wouldn't have discovered Rustoleum Heirloom White!
DIY Upholstery's You Tube videos- The instructive videos from DIY Upholstery really helped me understand the ins and outs of basic upholstery. Chris also said that pneumatic staplers were the way to go when reupholstering big projects... and I completely agree. Pneumatic staplers are amazing! (Just can't wait until I the day I own my own air compressor. Upholstery projects, here I come.)
Little Green Notebook- Jenny supplied me with the fabric and as always remains a unique source for creative inspiration.


 I especially liked Smitten Kitchen's tip on using parchment paper sprayed with oil to press down the treats in the pan. It's light years faster.
 Tower of goodness.
 Look, you can actually see specks of the brown butter in the marshmallow. The brown butter gives them a mild nutty taste. Yum!
 Clean up, not so fun. But oh-so delicious.
 We used the always relevant "Life is a Garden and Love is the Bloom" saying and printed it on vellum. It just worked perfectly with the flower bloom in the background of the picture. In case you're wondering, vellum is a wonderfully semi-translucent paper that can be tricky to print on. It's very slippery so it wouldn't print in my printer's laser printer. Luckily I was able to feed it through my home deskjet printer and it worked perfectly.
 So as you can see from this picture, there are two layers: the vellum and the actual invitation underneath mounted on cardstock.
 The two layers were bound together using pink ribbon. I cut the cardstock an extra half inch wide so I was able to fold it over the vellum to give it a clean, finished look.
  Finally, I made matching address labels.
  Let's take another look at this picture... isn't it just the sweetest childhood photograph ever?! Congratulations Katie, I hope you have a wonderful shower!


 Navy loves the chair too!

 I just love when rooms easily come together.


 We spent every day in Nusa Dua in one of these bales (pronounced ballet) overlooking the beach. It was a great way to quickly recover from the jet lag!
 We trekked out to Uluwatu to see the temple and watch a traditional Balinese Kecak dance at sunset.
 The gates looking into the temple.
 The entry way into our hotel villa in Ubud.
 This was our view from our villa terrace. Everyday we watched the monkeys play in the ravine. It was spectacular!
 Ancient temples abound in Ubud.
 I couldn't get over the gorgeous mossy patina that was everywhere on the island.
 A traditional Balinese dance.
 The dances were more like plays in that they came complete with wonderfully elaborate costumes!
 Rice paddies at dusk.
 The monkeys at the Ubud Monkey Forest were fascinating to watch. This guy reminded me of Navy.

