Tuesday, March 1, 2011

How to Keep those Bedskirts Straight

One of the things I was determined to fix with the bedroom makeover was the bedskirt.  It was driving me nuts how it was slightly longer than the bed frame and how it sagged and drooped.


After reading the comments on Isabella and Max Rooms' post on bedskirts, I discovered these guys.  It's the best $2.99 I've ever spent.  These little pins keep the skirt in place and prevents it from shifting around when you change the sheets.


After a good wash and ironing, I placed the skirt on the box spring exactly where I wanted it to sit and screwed these pins through the bedskirt into the box spring.  It has a surprisingly tight hold.


You'll notice that I had a lot of extra bedskirt fabric pulled over the top to shorten the length.  It lines up evenly and hits the floor at the right spot.  No overhang.  And once you put the mattress on top of the box spring you'll never notice the extra fabric in the middle.


Now it's perfectly straight and even. So much better!

Monday, January 10, 2011

Lamp Makeover

I inherited this lamp from my mom's cousin quite some time ago.  I love the combination of wood and plaster with brass grooves but the plaster was chipping and the brass was badly tarnished.  It was time for a makeover.  Plus, I was thinking about purchasing a new lamp from Room and Board for a corner of our living room but after some thought this one would work just fine.


The lamp has a signature on it and after a quick Google search I discovered that it was made by Fine Arts in Plaster.  According to Google, the time period is Mid-Century Modern and it's counterparts are selling on ebay for $150!  Oops... too late now.  Makeover it is.


The first thing I did was replace the electrical cord.  If this lamp really is Mid-Century Modern, that means the electrical dates back to the 1950's.  Definitely time for an upgrade!  A Make-A-Lamp Kit from Home Depot did the trick.


Unfortunately I don't have any pictures of the rewiring but it was very simple.  I followed the instructions on the package and I made sure to take a picture of the lamp before I disassembled it. That way, putting it back together would be a snap.  Before I reassembled the lamp, I cleaned all of the brass pieces with a lemon and salt scrub to remove as much of the dirt, grime and tarnish as I could.


Next I painted the plaster base with a Crevecoeur Grey Martha Stewart paint sample from Home Depot, much like the one pictured below.  I was too lazy to sand and prime the lamp so it took several coats of paint to get the coverage I wanted. 


Since the brass grooves were badly tarnished and impossible to clean I thought that gold leafing them would make them pop.  I purchased a gold leaf starter kit from Amazon and after the base had dried I gold leafed each individual circular groove.  Once again, I don't have any pictures from the gold leafing process but it was pretty easy if not slightly tedious.  I just used a paint brush to apply the adhesive to the grooves and then I used a Q-tip to burnish on a tiny piece of the gold leaf.  Lastly, I used the same paint brush to apply the sealer on each one.  It was time intensive but I enjoyed the process.  I watched Love Story and The Sting while gilding.  Gold Leafing + Old Movies = Fun!


Lastly, I purchased a drum lampshade from Lamps Plus.  I wanted a barrel lampshade because the lamp will reside on our windowsill and space will be tight.  This simple shade measures 8x11" and  looks great with the lamp.


I made a quick trip to Mood (of Project Runway fame and yes, Mood is on my list for a Shopping in the City post!) and purchased a yard of linen fabric to cover the lampshade.  A yard was more than enough fabric, in fact I had enough fabric leftover to cover another shade and still had some to spare. 


I used Isabella and Max Room's fabulous step-by-step tutorial to covering a lampshade.  I used fabric adhesive and since the shade was a barrel shape, it was super easy to wrap the linen fabric around it.


Finally I had some gold grosgrain ribbon from Kate's Paperie in my ribbon stash and it was the perfect accent to add to the shade.  I used the fabric adhesive and applied it on top of the linen.


And here is the finished lamp!  I love the way it turned out even though it was a month long process.  There were a lot of steps involved but it was well worth the effort.  It's unique and really adds an element of interest to our living room.


The lamp resides on the windowsill in the corner of our living room and is the perfect reading lamp.  I love it!


Cost Breakdown:

Make-A-Lamp-Kit: $9
Martha Stewart Paint Sample: $3
Gold Leafing Kit: $10
Drum Lampshade: $20
One Yard of Linen Fabric: $14
Ribbon: Free (already purchased)

TOTAL: $56

(Not bad, considering I was thinking about spending around $150 to get a new corner reading lamp)

Tuesday, November 30, 2010

The Best Trash Room Find Ever!

Look what I found last night in our trash room... the CB2 Big Dipper Arc Lamp! I cannot believe this lamp was going to go in the dumpster. It works perfectly, is in great condition and best of all it fits perfectly next to our new Pottery Barn Armchair. And I even I blogged about it's sister lamp at Crate and Barrel on my NYC Living Room Mood Board. Whoohoo... I love free stuff!


Thursday, January 21, 2010

Salvation Army

Today I hit up the Salvation Army in Ithaca. I have to say, Eddie Ross has really inspired me to visit the Salvation Army more often. You have to get beyond the disheveled merchandise and the really horrible junk and look for the hidden treasures. This doesn't mean that they'll be in pristine condition... usually they need a major scrub down and some kind of transformation, but think of it like a diamond in the rough. I'm always thinking to myself, "what would Eddie Ross do?"

I found this amazing filing cabinet today. It's an old Steelcase cabinet, the kind that they don't make anymore that uses real steel and weighs a TON. I love the brass hardware and the different sized drawers. It would be perfect for all my craft supplies. It needs a new paint job but that's easy enough. The price? $20. Can you believe that?! I was thisclose to buying it today but I held off. It's so heavy and would be a pain to move, since we'll be moving out of Ithaca and into a NYC apartment this summer. I wasn't sure if this was a good idea. What do you think? Should I go back and get it? It really is a great deal...


For some of my favorite Eddie Ross Salvation Army posts, click here and here, and here too.

Thursday, December 17, 2009

Beautify those Lids

I've saved this post from Design Sponge for quite some time now and I finally got around to "beautifying" the lid of an empty, cleaned out pimento jar. I love the small size, perfect for holding miscellaneous paper and binder clips. It was an easy, simple project that took me less than 10 minutes.

I didn't have any mod podge, but this worked just fine. I'm sure Elmer's would work too. Simple & easy is the name of the game. You can tell I was super excited about this project because I took photos before the glue even dried!

Don't forget to paper the inside lid too! A 2.5" round paper punch cut out the perfect round for inside.


Start saving those jars. There are so many ways to use them!

Thursday, June 25, 2009

Thrifty (and Crafty) Post #3
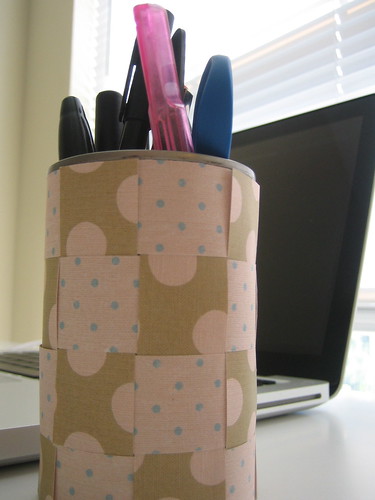
I woke up this morning with a case of the blahs. I've caught a summer cold and have been feeling slightly under the weather for the past few days. So I decided to work on some crafts to cheer myself up. I've been saving those ubiquitous Campbell's soup cans, ideal for pencil cups. A new one for my desk was the perfect project for today.

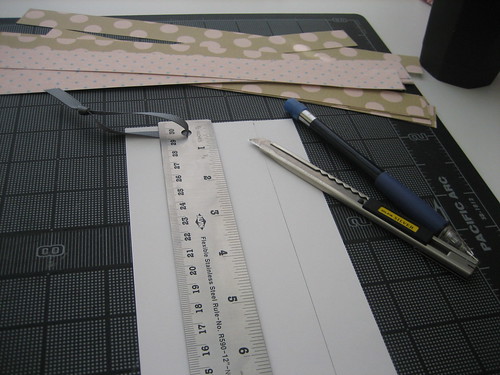
I started off by measuring and cutting 1" x 11" strips of Martha Stewart patterned paper.


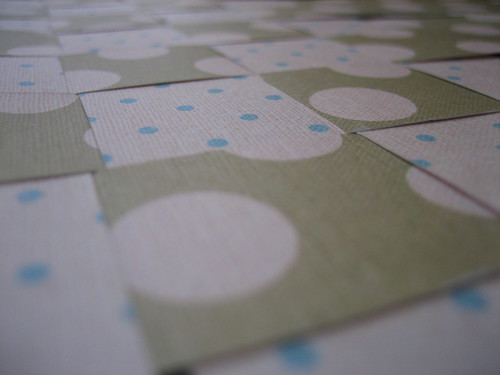
Then I wove the strips to make a basket weave pattern. Make sure to glue each strip together at the sides. Glue dots worked perfectly for this.

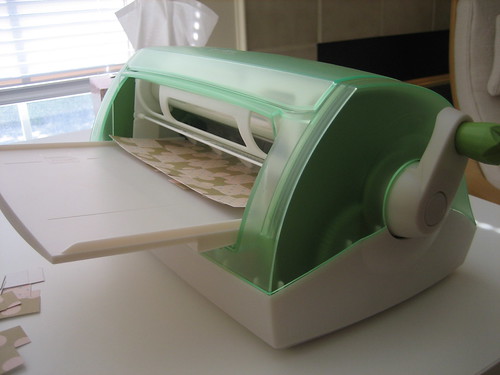
A quick zip through the Xyron machine... (the best invention ever!)

to give it an adhesive backing.


Wrap around your Campbell's soup can and you have yourself a cute pencil cup! I love that the weave pattern gives it a little bit of a textured look, almost like fabric.

Since I had some left over strips of paper, I decided to make some of these hanging ornaments. It's such an easy and simple project and they certainly brightened up my day!


Friday, June 19, 2009

Thrifty Post #2

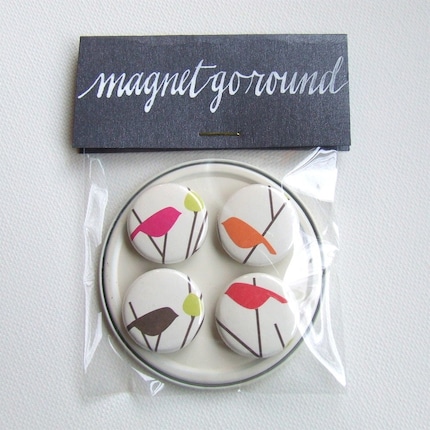
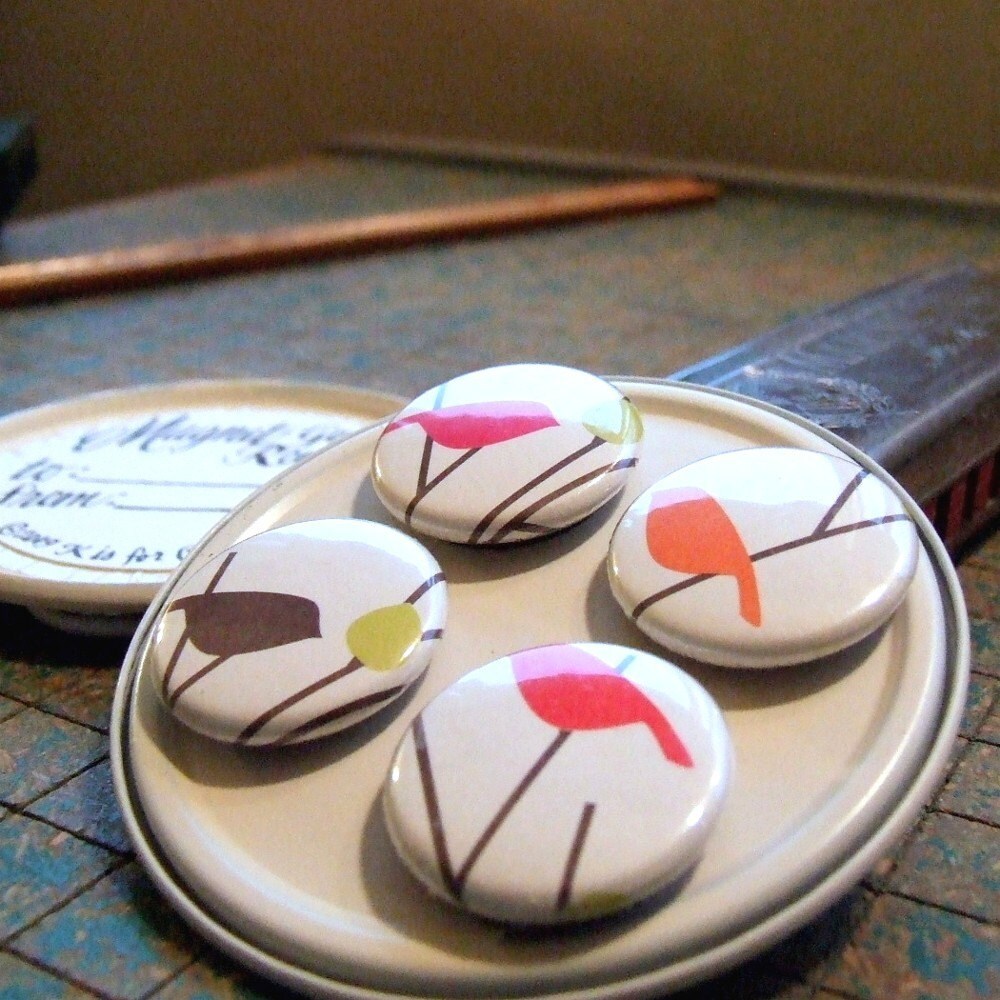
Unfortunately I can't take credit for Thrifty Post #2 but it was so good that I just couldn't resist sharing with you. Yesterday I was surfing Etsy when I found this wonderful store: K is for Calligraphy. I absolutely love her calligraphy and paper accessories. Everything is wonderfully packaged especially her magnet go-rounds. I've made a ton of magnets myself and the hardest part is packaging them so that they don't stick to each other and end up in a jumble. The little round disk that she used seemed to work perfectly. Turns out, the little round disks are the ends of the frozen orange juice containers that she had been saving for years. She just painted them white and added the hand calligraphed sticker on the other end. How clever is that?!


Sadly, it looks like the magnets are all sold out on Etsy. But I've found that sellers quickly replenish their stock so check back soon to see if they're re-listed.

Friday, June 12, 2009

Thrifty Post #1

We got this bouquet of flowers from our apartment building management when we moved in last week. (It's a long story, but basically our move in was a HUGE hassle so this was their apology gesture.) It was thoughtful and we certainly appreciated it, but the flowers didn't last long. This is how they looked today... kind of blah and the vase isn't my favorite.


I'm all about making the flowers last as long as possible so I always trim and re-arrange my bouquets. The only problem is I left all my lovely bud vases back in Ithaca. So I rummaged through our recycling bin and found a clean Emeril's Marinara jar. It works fine for a vase and I even like how the adhesive from the label left a stripey effect on the jar. I kind of like the country charm and a whole bunch of jars in different sizes would make an amazing arrangement for a picnic or casual get together.

Thursday, March 19, 2009

Recent Purchases


Last weekend I got a chance to hit up the Crate and Barrel outlet in Kittery, Maine. Let me just say, Major (and I mean major with a capital M) sale! Can you believe that I got all of these lovelies for just over $30?! Since I'm just so excited about my finds, here they are with links and exact dollar amounts:

From bottom to top:

Acacia Serving Board
, $4.95 - The perfect round board for a simple cheese and fruit display

Pritchard Platter, $3.00- I found this beauty in the clearance section. It has a tiny chip, but for that price I'll take it!

Grace Small Platter, $9.95- I'm super excited about this find because I have the Grace cake stand and I'll simply place this dish on an overturned bowl to create a tiered cake stand.

Deep Serving Stand, $14.95- I can't wait to use this as part of a beautiful centerpiece with whole sugared lemons and limes.

Total: $34.49 including tax
Yes, I can't quite believe it either. Get yourself to a C&B... stat!


I also got a sweet citrus reamer from one of my favorite antique stores in Newburyport, MA. It was about half the price of my total purchases from C&B- so a little pricey all things considered, but I just couldn't pass up the cuteness. I love the weight of the pressed glass and the color is divine! (And it also matches my Kitchen Aid.) So there you go... it was a great weekend of house ware purchases!

Related Posts Plugin for WordPress, Blogger...